 Save
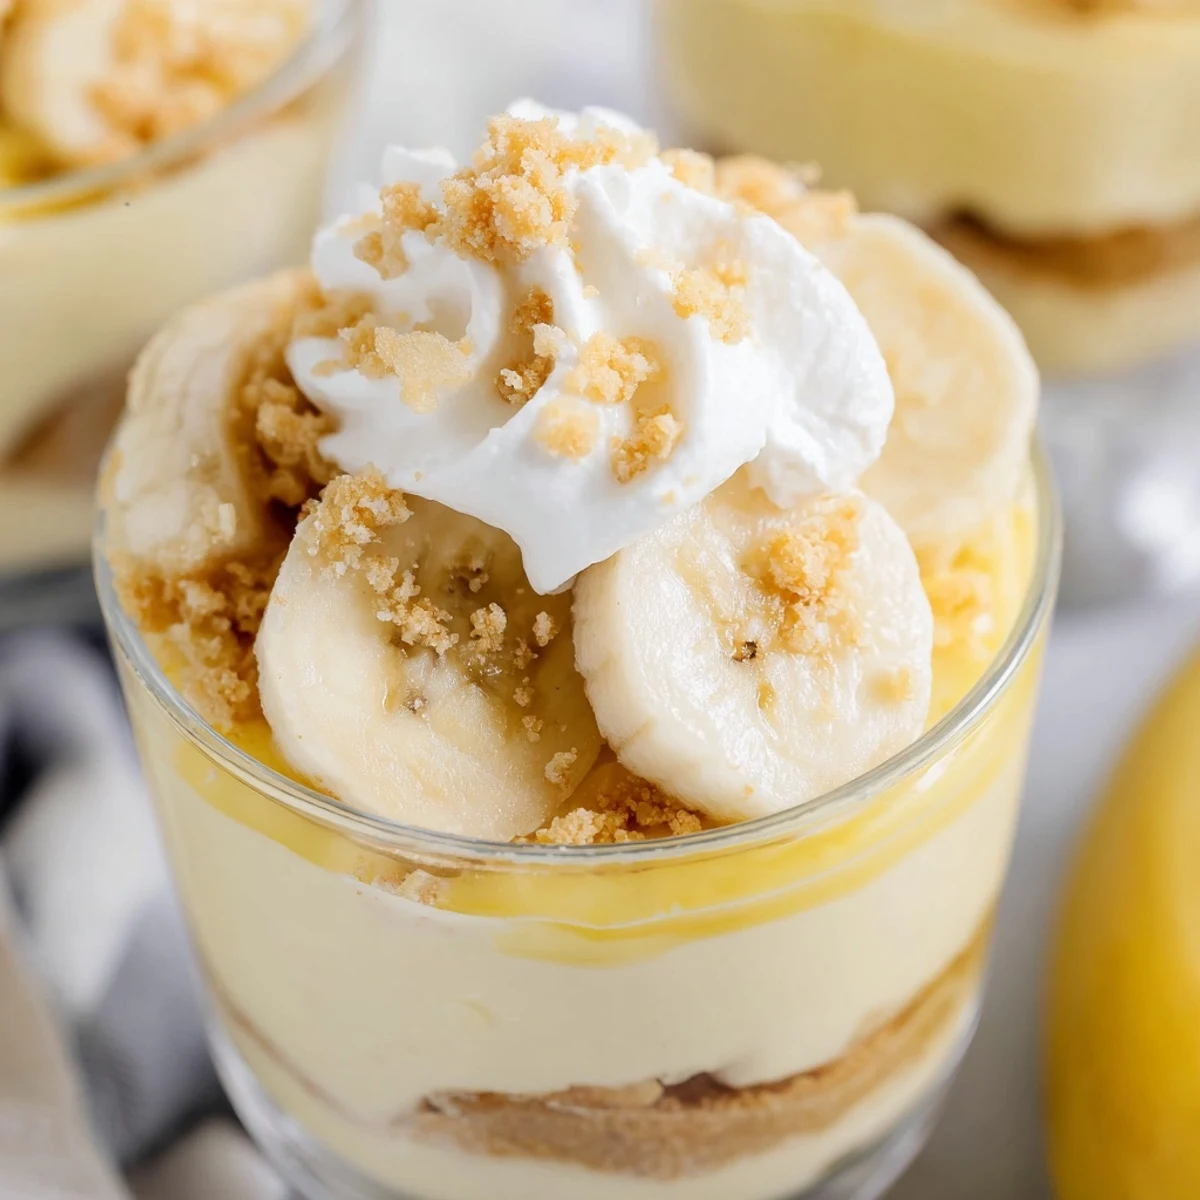
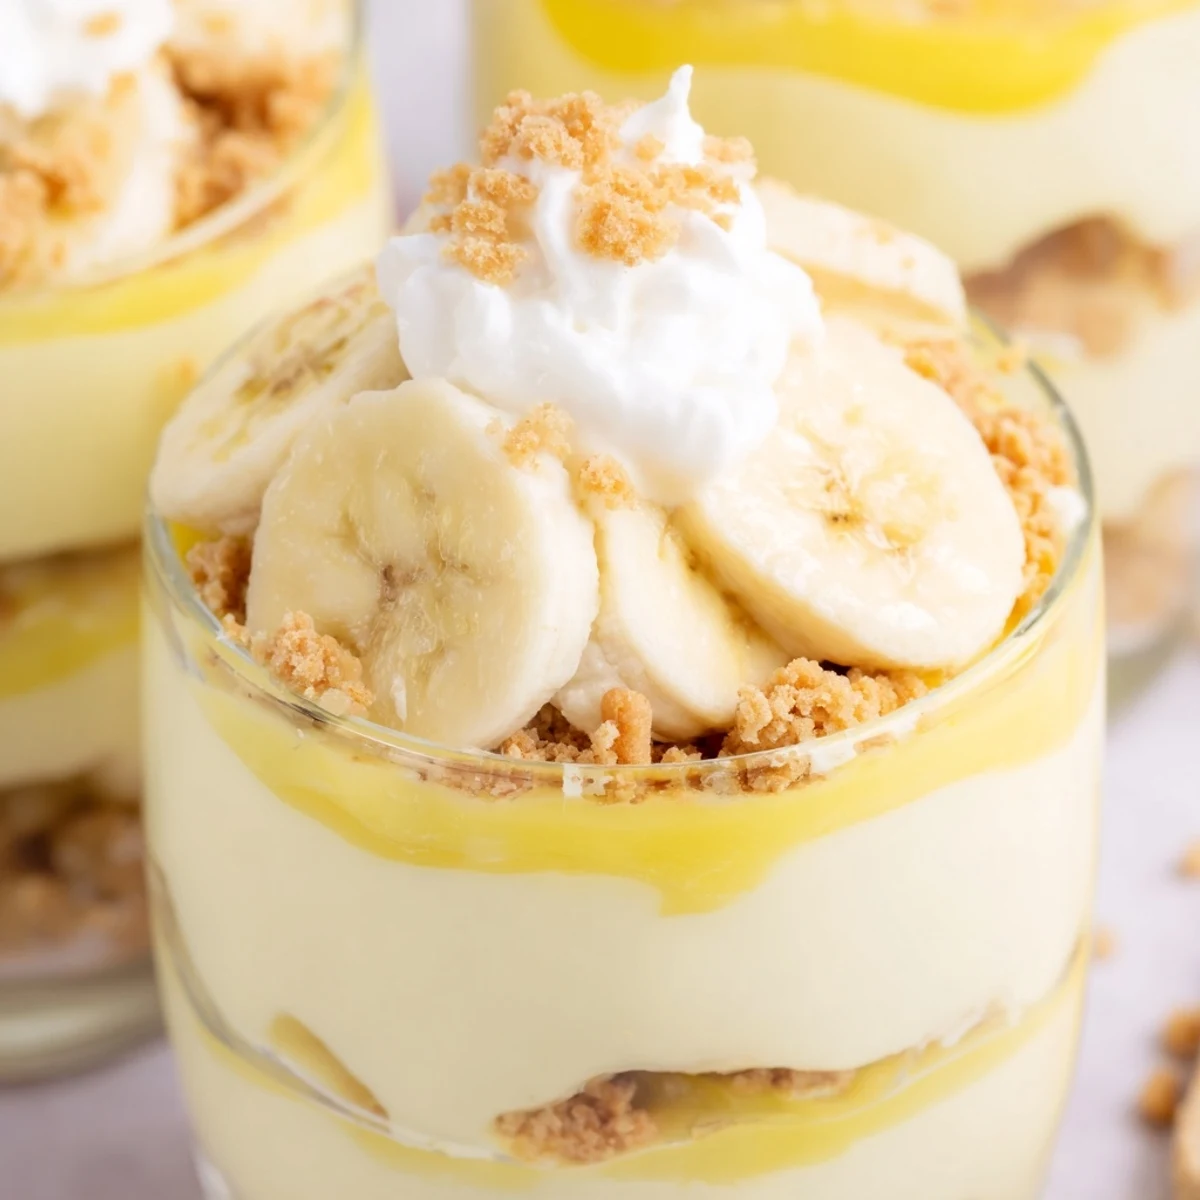
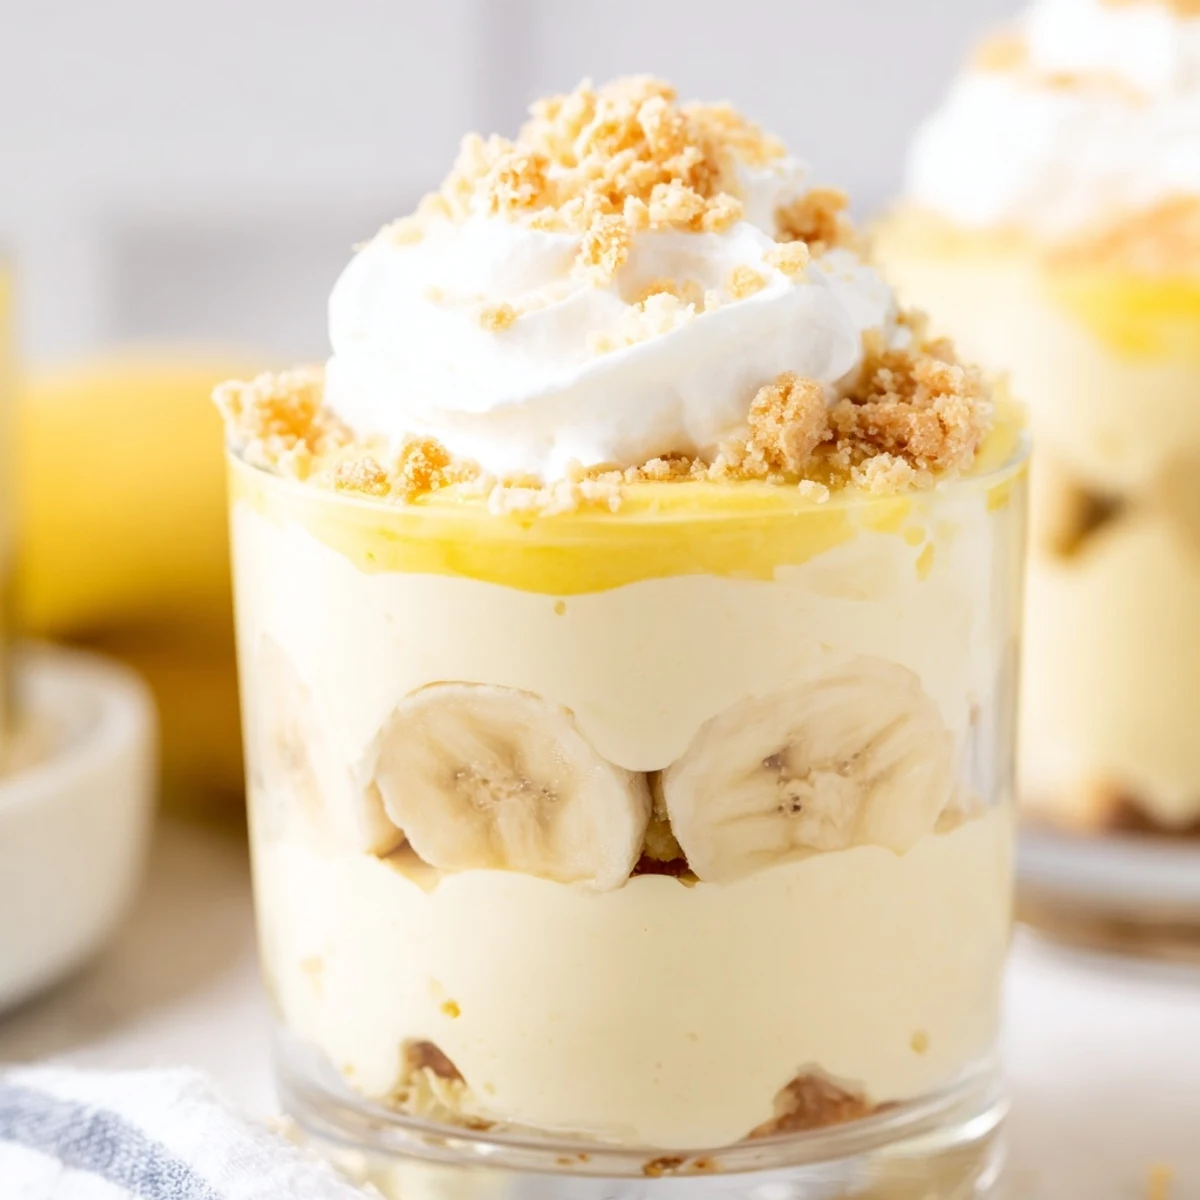
Save These individual cups combine the best of two classic desserts—creamy cheesecake and nostalgic banana pudding—into one convenient handheld treat. Each cup features a buttery vanilla wafer crust, smooth cheesecake filling, silky banana pudding layer, and fresh sliced bananas topped with crunchy crumbs.
The no-bake preparation comes together in just 20 minutes of active work, making it perfect for busy weeknights or last-minute gatherings. After chilling for at least 2 hours, the layers set into perfectly portioned servings that look impressive and taste even better.
The combination of tangy cream cheese, sweet banana pudding, and fresh fruit creates a balanced dessert that's not overly rich. The textural contrast between smooth fillings, crisp crust, and tender bananas makes every bite interesting.
My sister called me at 9 PM last Tuesday, demanding I bring something for her book club dessert emergency. I'd just finished grocery shopping and had cream cheese sitting on the counter, bananas turning spotted on the fruit bowl, and a half-empty box of vanilla wafers from the kids' snack stash. Ten minutes of frantic layering later, these cups emerged from my kitchen chaos. The book club texted me before I even got home asking for the recipe.
Last summer I made these for a Fourth of July potluck, and my friend's eight-year-old daughter took one bite, closed her eyes, and whispered 'this tastes like magic.' The kids started trading their brownie cookies for cheesecake cups. Now whenever I show up with that familiar stack of glass jars, the neighborhood kids actually stop their basketball game and hover near the serving table.
Ingredients
- 1 cup vanilla wafer cookies, crushed: I pulse mine in the food processor, but putting them in a ziplock bag and crushing with a rolling pin works perfectly and is oddly therapeutic
- 2 tbsp unsalted butter, melted: Salted butter works here too, just reduce any added salt in your recipe—the butter needs to be hot but not bubbling when mixed
- 8 oz cream cheese, softened: Leave it out for exactly one hour; cold cream cheese creates those dreaded tiny lumps that never quite disappear no matter how long you beat it
- 1/3 cup granulated sugar: This amount hits the sweet spot without making the cheesecake layer cloying—trust me, the bananas and wafers bring plenty of sweetness
- 1 tsp pure vanilla extract: I've tried imitation vanilla in a pinch, and while the recipe works, the real stuff makes the cream cheese taste like premium restaurant quality
- 1 cup heavy whipping cream, cold: Pop your mixing bowl in the freezer for ten minutes before whipping—cold cream whips faster and holds its structure better when folded
- 1 package instant banana pudding mix: The cook-and-serve pudding will not set properly here, so stick with instant despite what that recipe blog told you
- 1 1/4 cups cold whole milk: I've used 2% in a pinch, but whole milk creates that luxuriously thick pudding layer that doesn't separate
- 2 ripe bananas, sliced: Look for bananas with some brown spots—they're sweeter and mash better if you decide to incorporate some directly into the pudding layer
Instructions
- Build the foundation:
- Combine crushed vanilla wafers and melted butter in a small bowl, mixing until every crumb glistens with butter. Spoon about two tablespoons into each serving cup and press down gently with the back of a spoon—dont compact too tightly or the crust becomes impossible to dig through.
- Create the cloud layer:
- Beat cream cheese, sugar, and vanilla extract with a hand mixer on medium speed for exactly two minutes until the mixture is silky smooth. In a separate chilled bowl, whip cold heavy cream until stiff peaks form, then gently fold it into the cream cheese mixture until no white streaks remain.
- Prepare the banana silk:
- Whisk together the banana pudding mix and cold milk for two full minutes—the mixture should thickens noticeably. Let it sit for one minute before using, as it continues to set up and becomes easier to layer without disturbing the cheesecake underneath.
- Layer with love:
- Spoon half the cheesecake filling over the crust in each cup, followed by a single layer of banana slices. Divide the banana pudding evenly among cups, then top with the remaining cheesecake mixture, spreading carefully to avoid mixing the layers.
- Finish and chill:
- Sprinkle each cup with additional wafer crumbs, add fresh banana slices, and crown with whipped cream if desired. Cover and refrigerate for at least two hours—the flavors meld and the layers firm up beautifully during this time.
 Save
Save My grandmother, who never measured anything in her life, asked for the exact recipe after trying these at Easter Sunday dinner. She called them 'fancy in a jar' and now makes them for every church social, claiming she invented the recipe herself. I never correct her.
Making Ahead Like A Pro
I've learned through trial and error that you can assemble everything except the fresh banana topping up to 24 hours in advance. The crust stays perfectly crunchy and the cheesecake layer actually develops deeper flavor overnight. Just store the cups covered in the refrigerator and add the final banana slices and whipped cream about fifteen minutes before serving.
Banana Wisdom From The Kitchen
Tossing banana slices in a teaspoon of lemon juice before adding them to the cups prevents browning without affecting the flavor. I discovered this trick after serving brown-topped bananas at a dinner party and watching everyone politely eat around them. Now I keep a small bowl of lemon water on the counter whenever I'm prepping these.
Serving Strategy For Maximum Impact
Clear glass cups or jars are absolutely essential here because the layers create such stunning visual appeal. I use 8-ounce mason jars for casual gatherings and switched to footed dessert glasses for my sister's wedding shower last month. The same recipe tastes completely different when served in something fancy, which is either psychology or magic—I haven't decided which.
- Set up a small toppings bar with crushed wafers, extra whipped cream, and banana slices so guests can customize their final layer
- These travel surprisingly well if you keep them upright in a cardboard box with cup holders or a muffin tin
- The recipe doubles beautifully for larger crowds, though I recommend making two separate batches rather than one massive bowl to ensure even layering
 Save
Save These cheesecake cups have become my go-to dessert for every occasion because they look impressive but require zero actual cooking skill. Even my husband, whose culinary repertoire consists of toast and emergency cereal, can assemble these without disaster.
Recipe FAQs
- → Can I make these cups ahead of time?
-
Yes, you can prepare these cups up to 24 hours in advance. Assemble everything except the fresh banana toppings and store covered in the refrigerator. Add fresh banana slices and whipped cream just before serving to prevent browning.
- → What type of cups work best for serving?
-
Clear glass cups, mason jars, or dessert glasses work beautifully because they showcase the distinct layers. Any 6-8 ounce individual serving vessel will work well—just make sure they're refrigerator-safe.
- → How do I prevent banana slices from turning brown?
-
Toss banana slices lightly in lemon juice immediately after slicing to slow oxidation. You can also add the fresh banana topping just before serving rather than during assembly to maintain their bright appearance.
- → Can I use homemade banana pudding instead of instant?
-
Absolutely. Homemade custard-style banana pudding works wonderfully, though you'll need to chill it thoroughly before layering to ensure it sets properly. Allow extra time for the homemade pudding to cool completely.
- → What's the best way to crush vanilla wafers evenly?
-
Place the wafers in a sealed plastic bag and crush with a rolling pin for uniform crumbs, or pulse them in a food processor for a fine, even texture. Aim for crumbs similar to graham cracker crust consistency.
- → Can I freeze these cheesecake cups?
-
Freezing isn't recommended because the texture of the banana pudding and fresh bananas changes significantly when thawed. The creamy layers may become grainy or watery. These are best enjoyed fresh within 1-2 days of preparation.