 Save
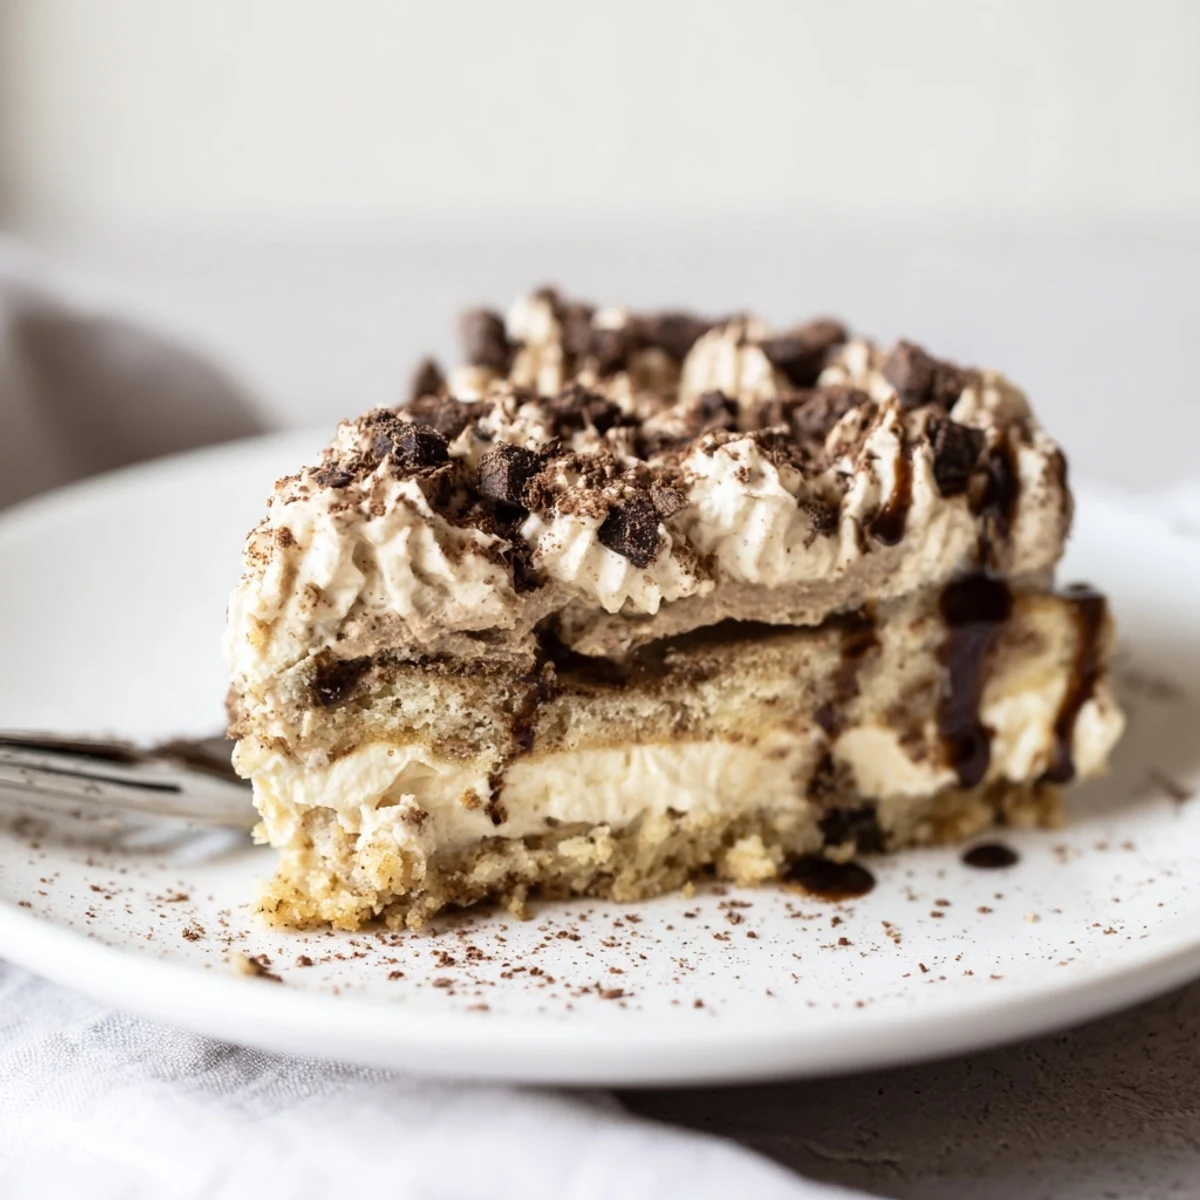
Save This luscious coffee-infused tiramisu cheesecake layers a crunchy ladyfinger cookie base with a smooth cream cheese and mascarpone filling scented with strong espresso and vanilla. After brushing the crust with a sweet coffee soak, bake in a water bath until just set, cool slowly, then chill for several hours. Top with whipped cream, cocoa and chocolate shavings before slicing to serve.
Sometimes the best desserts appear from the collision of two classics: tiramisu and cheesecake. I remember the scent of strong espresso wrapping around my kitchen one rainy afternoon, tempting me to try something a bit audacious. The counter was a glorious mess—splashes of coffee, a dusting of cocoa, and delicate ladyfingers that crumbled in my hands almost as quickly as my hesitation. This tiramisu cheesecake was born from both curiosity and a deep craving for something that felt just a little over the top.
I first assembled this showstopper for a birthday gathering when my friends, notorious for second helpings, were lingering in the living room. The laughter echoing from the next room seemed to pulse in time with my mixing, and when the final layer of cocoa floated down, I couldn't resist sneaking a grin—this dessert was going to be a hit, and I knew it.
Ingredients
- Ladyfinger biscuits (savoiardi): These soak up espresso beautifully and give the crust its whisper of crunch—crumbling them in a food processor saves time.
- Unsalted butter: Melted butter is the glue for the crust; be generous so it sets firmly.
- Instant espresso powder: Mixing this directly into the crust is my not-so-secret trick for a deep coffee hit before you even taste the filling.
- Cream cheese: Room temperature cream cheese blends to a flawlessness that only a few minutes of patience can give you.
- Mascarpone cheese: This is where classic tiramisu joins the party—don’t skip it if you want that signature silky finish.
- Granulated sugar: Just enough to sweeten, but not overpower, the coffee and cheese flavors.
- Eggs: Add one at a time, and don’t rush—trust me, it keeps things creamy, not dense.
- Strong brewed espresso: Let it cool, or you’ll scramble the eggs—learned that the dramatic way.
- Vanilla extract: A dash of warmth that quietly ties the layers together.
- All-purpose flour: This little bit stabilizes the filling for clean slices later on.
- Salt: A pinch sharpens all the other flavors, so don’t leave it out.
- Coffee liqueur (optional): Adds a grown-up twist—just a splash goes a long way.
- Heavy cream: Cold from the fridge, it whips up like a dream for that swooshy topping.
- Powdered sugar: Melts seamlessly into the cream, avoiding any graininess.
- Cocoa powder & dark chocolate shavings: Both are about drama and finish; I love dusting generously right before serving for the classic tiramisu look.
Instructions
- Get Your Pan Ready:
- Set your oven to 160°C (325°F), and line a 23 cm springform pan—skinny strips of parchment along the edges make life easier later.
- Build the Crust:
- Blitz ladyfingers to a sandy crumb, then stir in melted butter and instant espresso until the mixture clumps irresistibly; press it firmly into the pan and bake for 10 minutes.
- Mix the Coffee Soak:
- Dissolve granulated sugar into hot espresso and swirl in the coffee liqueur; set it aside so it cools to room temperature without losing its aroma.
- Blend the Filling:
- Beat cream cheese, mascarpone, and sugar until not a single lump remains; add eggs one at a time, scraping down the bowl, followed by espresso, vanilla, flour, and salt until just mixed.
- Soak and Fill:
- Brush half of your fragrant coffee soak across the cooled crust, letting it settle in—then pour in the silky filling and shimmy the pan gently to even it out.
- Bake with Care:
- Set the pan in a larger tray with hot water for a gentle, steamy bake; after about an hour, when the cheesecake barely jiggles at the center, it’s ready for its slow cool-down in the oven with the door ajar.
- Chill for Patience:
- Cool completely on the counter, then let it rest in your fridge at least 4 hours (overnight if you can stand it) for perfect slices.
- Finish with Flair:
- Before serving, whip cream with powdered sugar and vanilla until perky, smooth it over the cake, then dust with cocoa and shower with chocolate shavings—don’t forget to swipe your finger across the bowl first.
 Save
Save There was a moment, mid-slice at a family picnic, when my notoriously reserved aunt actually closed her eyes after tasting the first bite. She simply raised her fork as if to savor the moment longer—and that was all the praise I could ever want for this cheesecake.
When to Make This Tiramisu Cheesecake
On winter evenings when the air smells faintly of woodsmoke, this cheesecake makes the kitchen feel like a warm retreat. Honestly, it's equally perfect for celebrations, neighborhood potlucks, or any afternoon where you crave something that pairs well with a strong cup of coffee and good company.
My Favorite Shortcuts
I’ve learned that using instant espresso powder in the base is a game-changer for both speed and depth of flavor. You can crush the ladyfingers with a rolling pin in a sturdy bag if you’re skipping the food processor—messy, but deeply satisfying work.
What to Watch Out For
Cheesecake can be sneaky: if you overbake, it’ll be dry and a little sad, so trust your eyes more than the timer, looking for that gentle wobble in the center. If you’re new to water baths, wrap your pan in foil first to keep every crumb dry and crisp.
- Let the cake cool slowly to avoid cracks.
- Whip topping just until stiff—overwhipping turns it grainy.
- Espresso must be cool before mixing into filling, always.
 Save
Save If you try this, I hope it brings a little bit of ceremony and a lot of delight to your table. Don’t forget to save yourself that first, perfect piece—you’ve earned it.
Recipe FAQs
- → How strong should the coffee be?
-
Use a very strong brewed espresso or concentrated coffee to ensure the coffee flavor stands up to the rich cheeses. Cool it before adding to the filling to avoid thinning the batter.
- → Can I substitute the ladyfingers?
-
Yes. Digestive biscuits, graham crackers or a sturdy cookie crumble work well for the crunchy base; adjust sugar and butter to achieve a firm pressable crust.
- → Why bake the cheesecake in a water bath?
-
The water bath provides gentle, even heat that helps prevent cracking and produces a silky, tender texture by regulating the oven temperature around the pan.
- → How do I avoid cracks on the surface?
-
Avoid overbeating the eggs, bake until the center is just set with a slight jiggle, and cool the cake slowly with the oven door cracked before chilling. These steps minimize cracking.
- → How long should it chill before serving?
-
Chill at least 4 hours, preferably overnight. Extended chilling helps the filling firm up and lets the flavors meld for a better slice and cleaner presentation.
- → Can I make it alcohol-free?
-
Yes. Omit the coffee liqueur and increase the espresso or add a splash of chilled strong coffee or a nonalcoholic coffee extract to maintain depth of flavor.